Importing Models
From Computing and Software Wiki
| Line 1: | Line 1: | ||
__TOC__ | __TOC__ | ||
| - | + | ==Getting Started== | |
| - | + | If you find that the world editor geometry, or supplied models do not fit your experimental needs there is an easy solution. The world editor has a function built in that allows you to import models from 3rd party modelling programs such as Maya, 3D Studio Max, or Blender. As long as you can export your file to the '''Collada''' file format '''(*.dae)''', the world editor is able to open the object. In this tutorial we will be using [http://usa.autodesk.com/adsk/servlet/index?siteID=123112&id=7635018 Audodesk Maya] as an example for importing models and using them in a world. Maya does have native .dae export support which we will be using. However, if you find it to be too buggy the easiest solution is to use the [http://www.feelingsoftware.com/component/option,com_docman/Itemid,80/lang,en/ Feeling Software Collada Export Plugin] for Maya. You may download the required files and activate the plugin for Maya following the instructions on the website. Once finished you are ready to begin exporting your scenes with the plugin which may result in better written *.dae files. | |
| - | + | ||
==Importing Scene Data== | ==Importing Scene Data== | ||
| - | <br> | + | <br>When you are ready to export from Autodesk Maya make sure your entire model is selected and click on '''File > Export Selection'''. You will be prompted with a export box, save as '''Files of Type: DAE_FBX (*.dae)''' with an appropriate name. In our example it is '''Waterdrop.dae'''. If you are using the Feeling Software Plugin make sure to select it from the Save Type and also in the options check Bake Transforms. After files have been exported they should be relocated to the directory '''..\C4\Import'''. |
<br>[[Image:Import1.jpg]] | <br>[[Image:Import1.jpg]] | ||
| - | <br>Start C4 and select Tool | + | <br>Start C4 and select '''Tool > New World'''. Then choose '''World > Import Scene''' |
<br>[[Image:Import2.jpg]] | <br>[[Image:Import2.jpg]] | ||
| - | <br>Import Scene dialog | + | <br>You will be prompted with an Import Scene dialog where you should navigate to the appropriate file you have exported from Maya and click OK. |
<br>[[Image:Import3.jpg]] | <br>[[Image:Import3.jpg]] | ||
<br>After selecting a Collada file, the imported geometry (as well as lights and materials) will appear in the World Editor. At this point, you may make any changes that you need to. | <br>After selecting a Collada file, the imported geometry (as well as lights and materials) will appear in the World Editor. At this point, you may make any changes that you need to. | ||
| - | <br>Note that during the import process, the World Editor will keep track of the materials used by the imported geometry. | + | <br>Note that during the import process, the World Editor will keep track of the materials used by the imported geometry from Maya. However, each image must be imported using the [http://www.cas.mcmaster.ca/wiki/index.php/Importing_Textures Importing Textures] so that they are in the appropriate '''*.tex''' format that the engine can understand. You may then need to hit the Clean button in the Material Manager in order to refresh all of the materials. |
| + | |||
[[Image:Import4.jpg]] | [[Image:Import4.jpg]] | ||
Revision as of 04:38, 20 March 2008
Contents |
Getting Started
If you find that the world editor geometry, or supplied models do not fit your experimental needs there is an easy solution. The world editor has a function built in that allows you to import models from 3rd party modelling programs such as Maya, 3D Studio Max, or Blender. As long as you can export your file to the Collada file format (*.dae), the world editor is able to open the object. In this tutorial we will be using Audodesk Maya as an example for importing models and using them in a world. Maya does have native .dae export support which we will be using. However, if you find it to be too buggy the easiest solution is to use the Feeling Software Collada Export Plugin for Maya. You may download the required files and activate the plugin for Maya following the instructions on the website. Once finished you are ready to begin exporting your scenes with the plugin which may result in better written *.dae files.
Importing Scene Data
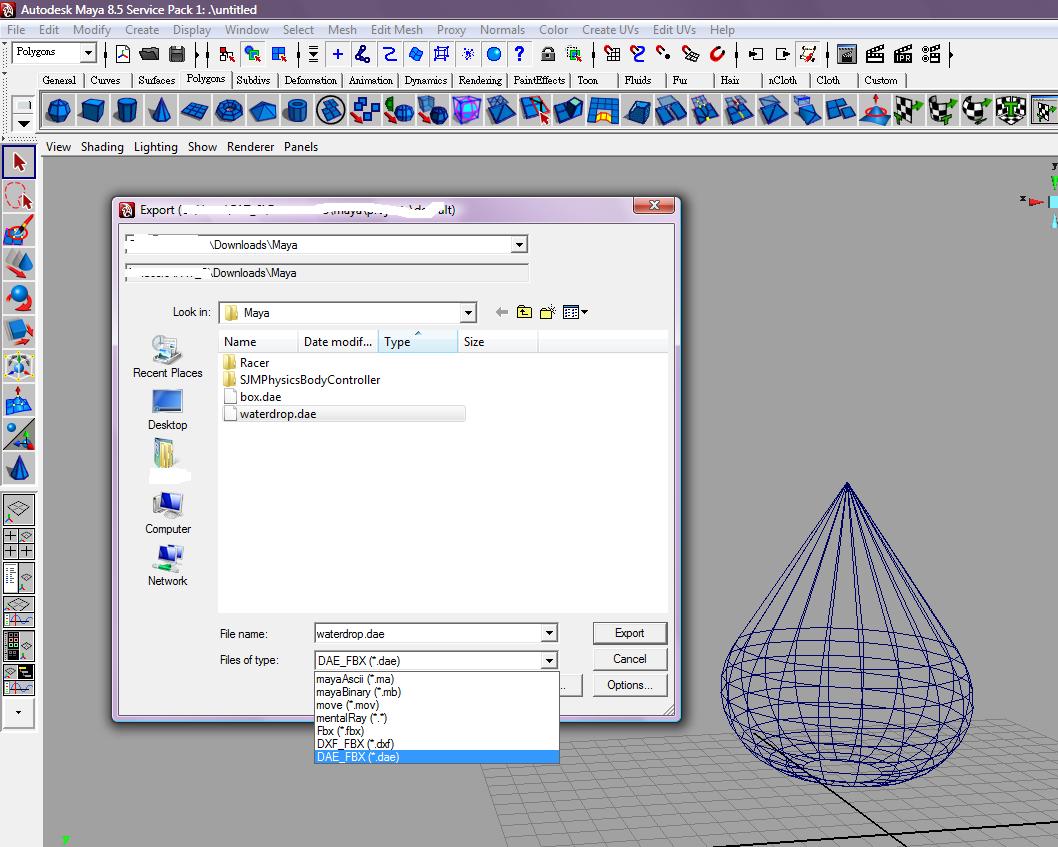
When you are ready to export from Autodesk Maya make sure your entire model is selected and click on File > Export Selection. You will be prompted with a export box, save as Files of Type: DAE_FBX (*.dae) with an appropriate name. In our example it is Waterdrop.dae. If you are using the Feeling Software Plugin make sure to select it from the Save Type and also in the options check Bake Transforms. After files have been exported they should be relocated to the directory ..\C4\Import.
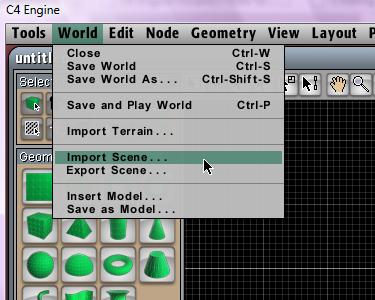
Start C4 and select Tool > New World. Then choose World > Import Scene
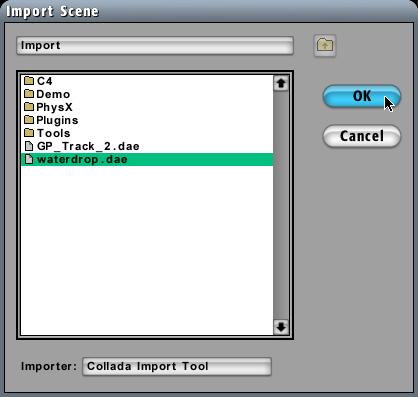
You will be prompted with an Import Scene dialog where you should navigate to the appropriate file you have exported from Maya and click OK.
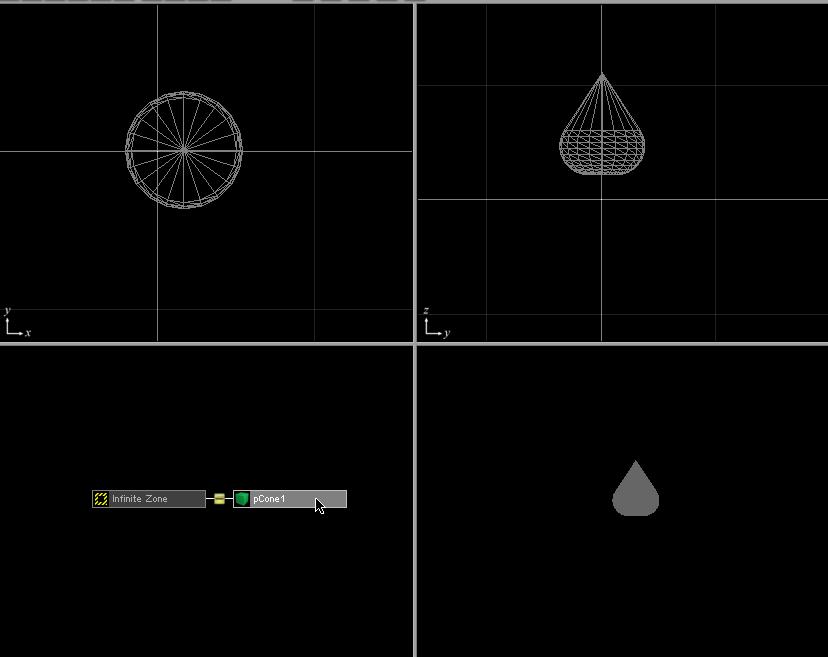
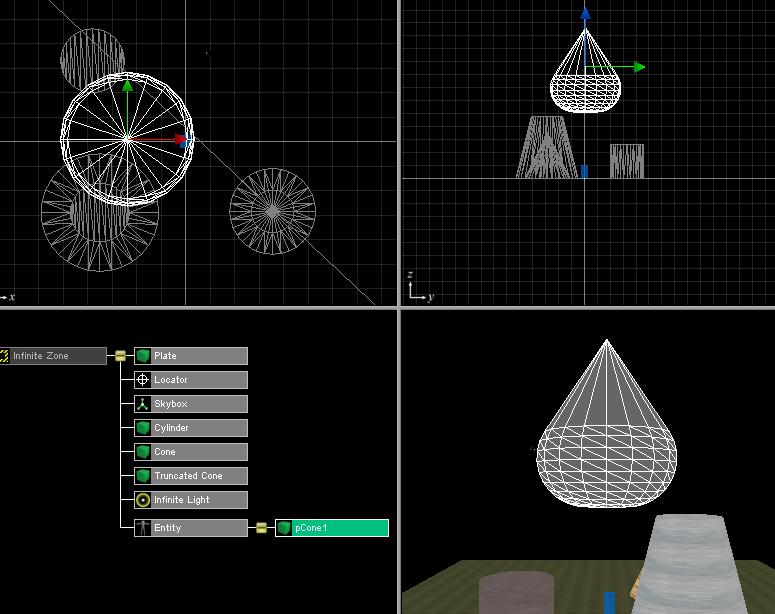
After selecting a Collada file, the imported geometry (as well as lights and materials) will appear in the World Editor. At this point, you may make any changes that you need to.
Note that during the import process, the World Editor will keep track of the materials used by the imported geometry from Maya. However, each image must be imported using the Importing Textures so that they are in the appropriate *.tex format that the engine can understand. You may then need to hit the Clean button in the Material Manager in order to refresh all of the materials.
Exporting to a Model
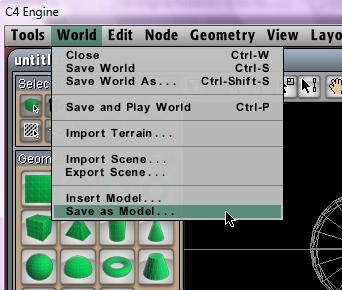
After you make the change, select World - Save as Model
Export Model dialog shows up. Give the model a name and choose the location that you want to save at. Click OK
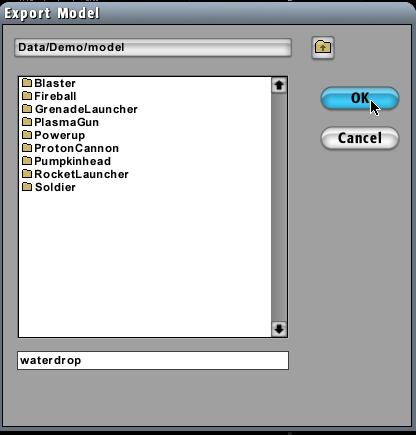
Now, you can close the world and the collada file has covert to a model file
Insert Model to a world
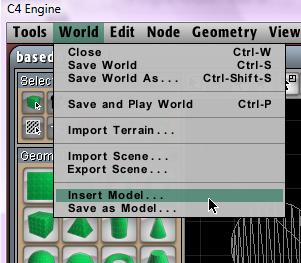
To insert the model that you just import, open the world that you work on and from the menu, select World - Insert Model
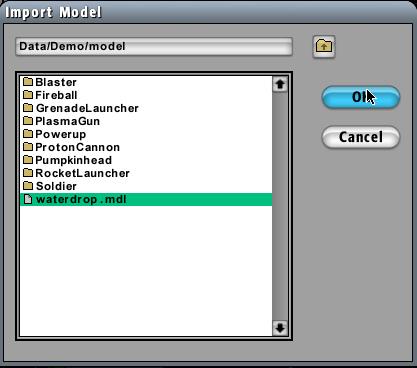
Import Model dialog display and you should see the model that you just import. Click OK
In the viewports
Return to RCaragogo
References
http://www.terathon.com/wiki/index.php?title=Creating_an_Entity_Model
