Creating a new world
From Computing and Software Wiki
| Line 3: | Line 3: | ||
<br>'''Make a new world''' | <br>'''Make a new world''' | ||
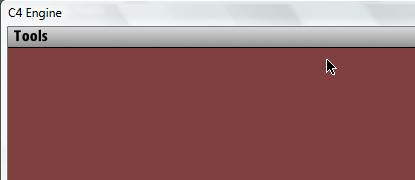
<br>Start C4, when the main menu is displayed, press the ESC key to close it and press the tilde key twice to display the main toolbar. | <br>Start C4, when the main menu is displayed, press the ESC key to close it and press the tilde key twice to display the main toolbar. | ||
| - | + | ||
| + | [[Image:newworld1.jpg]] | ||
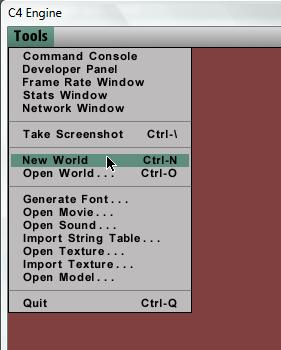
Click on the Tools menu and select New World, or press Ctrl-N | Click on the Tools menu and select New World, or press Ctrl-N | ||
| - | + | ||
| + | [[Image:newworld2.jpg]] | ||
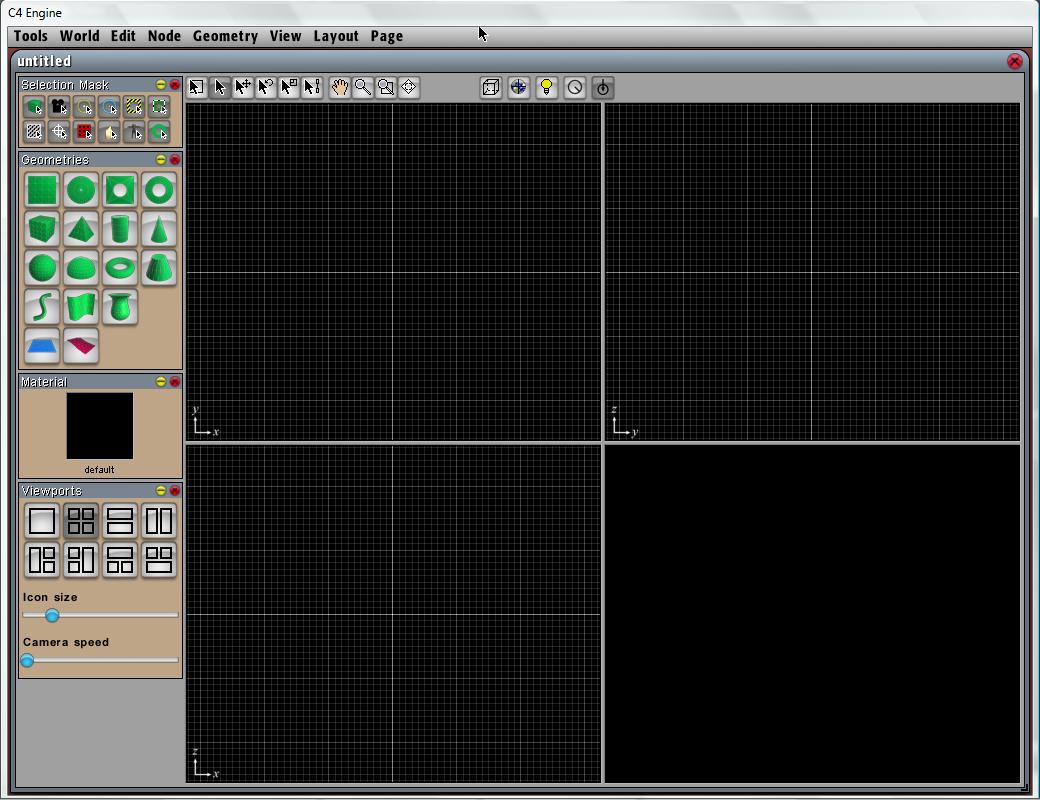
A new world file is displayed with the name untitled. | A new world file is displayed with the name untitled. | ||
| - | + | ||
| + | [[Image:newworld3.jpg]] | ||
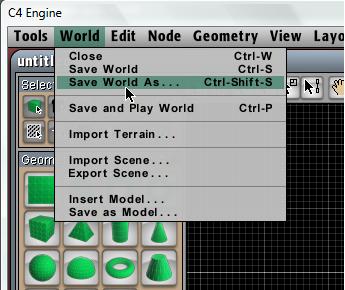
Click on the World menu and select Save World As ... | Click on the World menu and select Save World As ... | ||
| - | + | ||
| + | [[Image:newworld4.jpg]] | ||
Save it as "Base" or any name you like in the directory "Data/MyGame/world". | Save it as "Base" or any name you like in the directory "Data/MyGame/world". | ||
| - | + | ||
| + | [[Image:newworld5.jpg]] | ||
To minimize the potential for loss of data, save worlds on a regular basis. When adding major updates, add a version number suffix to the end of the filename, so if the world file gets corrupted at any point it is easy to use the previous version. E.g. the next time the file needs saving, choose Save Word As ... and change the name to Base-01, Base-02 etc. | To minimize the potential for loss of data, save worlds on a regular basis. When adding major updates, add a version number suffix to the end of the filename, so if the world file gets corrupted at any point it is easy to use the previous version. E.g. the next time the file needs saving, choose Save Word As ... and change the name to Base-01, Base-02 etc. | ||
| Line 22: | Line 27: | ||
<br> | <br> | ||
Access the Scene Graph by right clicking in a viewport and selecting "Scene Graph" | Access the Scene Graph by right clicking in a viewport and selecting "Scene Graph" | ||
| - | + | ||
| + | [[Image:newworld6.jpg]] | ||
| + | |||
The Scene Graph will display all of the world's nodes in a hierarchical tree structure, with the Infinite Zone at the root, this is also called the Root Node. As this is a new world file, no nodes have been added to the scene graph yet, by default there is always an Infinite Zone. | The Scene Graph will display all of the world's nodes in a hierarchical tree structure, with the Infinite Zone at the root, this is also called the Root Node. As this is a new world file, no nodes have been added to the scene graph yet, by default there is always an Infinite Zone. | ||
| - | + | ||
| + | [[Image:newworld7.jpg]] | ||
| + | |||
With the Scene Graph open, select the first node called Infinite Zone, the selected Node is highlighted in green. | With the Scene Graph open, select the first node called Infinite Zone, the selected Node is highlighted in green. | ||
| - | + | ||
| + | [[Image:newworld8.jpg]] | ||
| + | |||
Once highlighted press Ctrl-I or select Get Info from the Node menu. The Node info dialog is displayed for the Infinite Zone, defaulting to the Zone tab. As a Skybox needs to be added to the Infinite Zone, check the Render skybox in this zone check box. | Once highlighted press Ctrl-I or select Get Info from the Node menu. The Node info dialog is displayed for the Infinite Zone, defaulting to the Zone tab. As a Skybox needs to be added to the Infinite Zone, check the Render skybox in this zone check box. | ||
| - | + | ||
| + | [[Image:newworld9.jpg]] | ||
| + | |||
Click OK to close the Node Info dialog. To add the skybox, the skybox page needs to be visible in the editor, from the main menu bar at the top, click on Page and select Skybox. | Click OK to close the Node Info dialog. To add the skybox, the skybox page needs to be visible in the editor, from the main menu bar at the top, click on Page and select Skybox. | ||
| - | + | ||
| + | [[Image:newworld10.jpg]] | ||
| + | |||
The Skybox Page is displayed on the Left. | The Skybox Page is displayed on the Left. | ||
| - | + | ||
| + | [[Image:newworld11.jpg]] | ||
| + | |||
Click on the icon and notice that the cursor turns to a small crosshair, click on the Infinite Zone node in the Scene Graph and the skybox node is attached to the Infinite Zone node. The Scene Graph now looks like this, note that the new node is highlighted in green once it is added. | Click on the icon and notice that the cursor turns to a small crosshair, click on the Infinite Zone node in the Scene Graph and the skybox node is attached to the Infinite Zone node. The Scene Graph now looks like this, note that the new node is highlighted in green once it is added. | ||
| - | + | ||
| + | [[Image:newworld12.jpg]] | ||
| + | |||
Press the 1 key or click on the button, to return to the Select Nodes pointer. Open up the Node Info dialog (By pressing Ctrl-I). | Press the 1 key or click on the button, to return to the Select Nodes pointer. Open up the Node Info dialog (By pressing Ctrl-I). | ||
| - | + | ||
| + | [[Image:newworld13.jpg]] | ||
| + | |||
Click on the Skybox tab | Click on the Skybox tab | ||
| - | + | ||
| + | [[Image:newworld14.jpg]] | ||
| + | |||
To add a texture, click on the Arrow on the right of Positive X texture map text box, and the Texture Map dialog is displayed. If the demo is being used to work through this tutorial, the textures will not be visible, and their respective text values will have to be added manually. | To add a texture, click on the Arrow on the right of Positive X texture map text box, and the Texture Map dialog is displayed. If the demo is being used to work through this tutorial, the textures will not be visible, and their respective text values will have to be added manually. | ||
| - | + | ||
| + | [[Image:newworld15.jpg]] | ||
| + | |||
Select Storm1.tex and Click OK. | Select Storm1.tex and Click OK. | ||
| - | + | ||
| + | [[Image:newworld16.jpg]] | ||
| + | |||
<br> | <br> | ||
Note that the texture map dialog displayed Data/Demo/sky/ as the path name, whereas in the Node Info dialog the path ends up as sky/Storm1 | Note that the texture map dialog displayed Data/Demo/sky/ as the path name, whereas in the Node Info dialog the path ends up as sky/Storm1 | ||
<br> | <br> | ||
Browse to the textures or just enter them by hand, so, copy the first value and paste the values in the remaining fields, changing the final number. Also check the Enable skybox glow check box. | Browse to the textures or just enter them by hand, so, copy the first value and paste the values in the remaining fields, changing the final number. Also check the Enable skybox glow check box. | ||
| - | + | ||
| - | + | [[Image:newworld17.jpg]] | |
| - | + | ||
| + | Click OK to finish adding your Skybox. | ||
<br> | <br> | ||
<br>'''Creating a Plane or Geometric''' | <br>'''Creating a Plane or Geometric''' | ||
| Line 58: | Line 86: | ||
<br> | <br> | ||
Creating a plane (or floor) to let our objects or player to run on, so they do not fall into "space" | Creating a plane (or floor) to let our objects or player to run on, so they do not fall into "space" | ||
| - | + | ||
| + | [[Image:newworld18.jpg]] | ||
| + | |||
Adding a box on the plane | Adding a box on the plane | ||
| - | + | ||
| + | [[Image:newworld19.jpg]] | ||
| + | |||
<br> | <br> | ||
<br>'''Creating a Player or Spectator Spawn Marker''' | <br>'''Creating a Player or Spectator Spawn Marker''' | ||
| Line 67: | Line 99: | ||
<br> | <br> | ||
From the Page menu, select Markers. | From the Page menu, select Markers. | ||
| - | + | ||
| + | [[Image:newworld20.jpg]] | ||
| + | |||
The markers page is added to the panel on the left. | The markers page is added to the panel on the left. | ||
| - | + | ||
| + | [[Image:newworld21.jpg]] | ||
| + | |||
Add a Location Marker to the scene using the top left viewport, add it on top of the floor bottom right. As in the image below. | Add a Location Marker to the scene using the top left viewport, add it on top of the floor bottom right. As in the image below. | ||
| - | + | ||
| + | [[Image:newworld22.jpg]] | ||
| + | |||
Rotate the marker around so that the red arrow points towards the column, the red arrow is the direction the player will point when spawning. | Rotate the marker around so that the red arrow points towards the column, the red arrow is the direction the player will point when spawning. | ||
| - | + | ||
| + | [[Image:newworld23.jpg]] | ||
| + | |||
Finally decide what type of spawn marker is required, highlight the marker and press Ctrl-I, click on the Locator tab and in the Locator type text box add either spwn (for a character) or spec (for a spectator). | Finally decide what type of spawn marker is required, highlight the marker and press Ctrl-I, click on the Locator tab and in the Locator type text box add either spwn (for a character) or spec (for a spectator). | ||
| - | + | ||
| - | Click OK. And Save the World file. | + | [[Image:newworld24.jpg]] |
| - | + | ||
| - | From the World menu, select Save and Play World | + | Click OK. And Save the World file. From the World menu, select Save and Play World |
| - | + | ||
| + | [[Image:newworld25.jpg]] | ||
| + | |||
Once the world file loads, press ESC to remove the toolbar, you can now move around the world as a character or spectator. | Once the world file loads, press ESC to remove the toolbar, you can now move around the world as a character or spectator. | ||
<br> | <br> | ||
Revision as of 20:28, 18 March 2008
After reading this tutorial, you should able to create a basic world and get it run.
Make a new world
Start C4, when the main menu is displayed, press the ESC key to close it and press the tilde key twice to display the main toolbar.
Click on the Tools menu and select New World, or press Ctrl-N
A new world file is displayed with the name untitled.
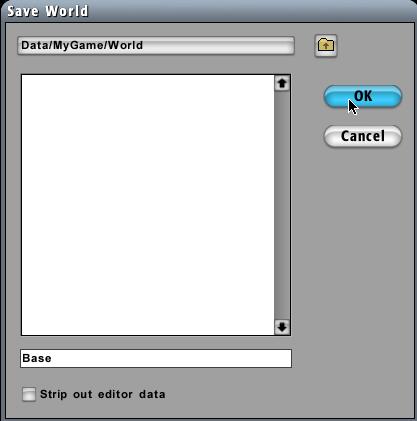
Click on the World menu and select Save World As ...
Save it as "Base" or any name you like in the directory "Data/MyGame/world".
To minimize the potential for loss of data, save worlds on a regular basis. When adding major updates, add a version number suffix to the end of the filename, so if the world file gets corrupted at any point it is easy to use the previous version. E.g. the next time the file needs saving, choose Save Word As ... and change the name to Base-01, Base-02 etc.
Creating a Skybox
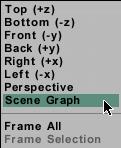
Access the Scene Graph by right clicking in a viewport and selecting "Scene Graph"
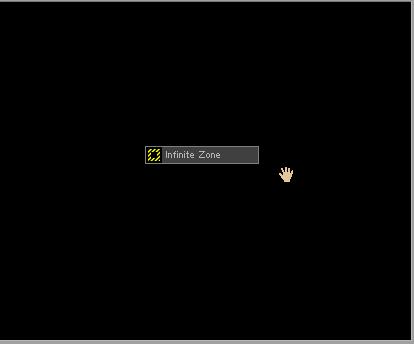
The Scene Graph will display all of the world's nodes in a hierarchical tree structure, with the Infinite Zone at the root, this is also called the Root Node. As this is a new world file, no nodes have been added to the scene graph yet, by default there is always an Infinite Zone.
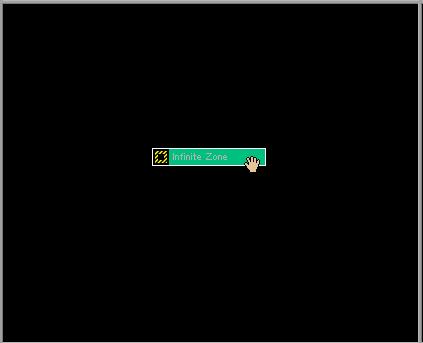
With the Scene Graph open, select the first node called Infinite Zone, the selected Node is highlighted in green.
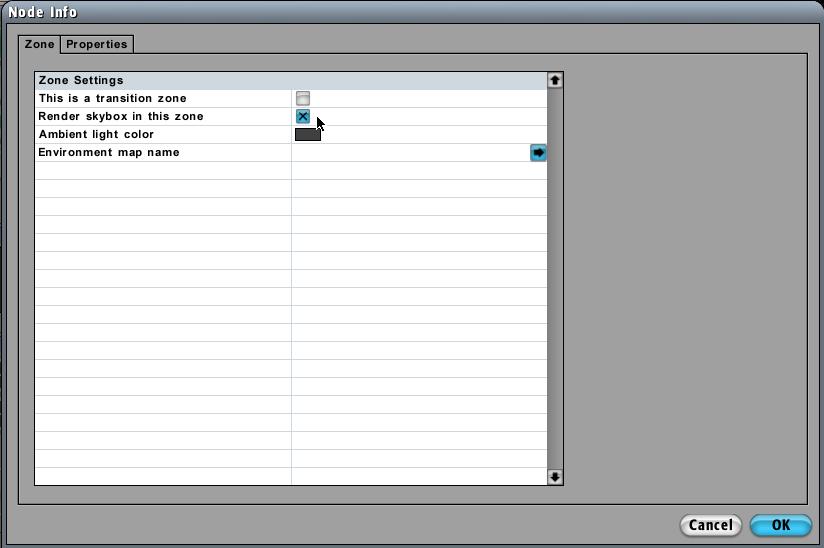
Once highlighted press Ctrl-I or select Get Info from the Node menu. The Node info dialog is displayed for the Infinite Zone, defaulting to the Zone tab. As a Skybox needs to be added to the Infinite Zone, check the Render skybox in this zone check box.
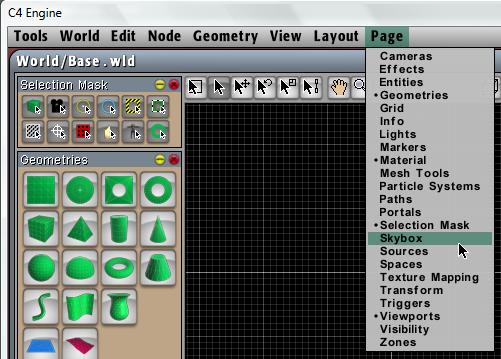
Click OK to close the Node Info dialog. To add the skybox, the skybox page needs to be visible in the editor, from the main menu bar at the top, click on Page and select Skybox.
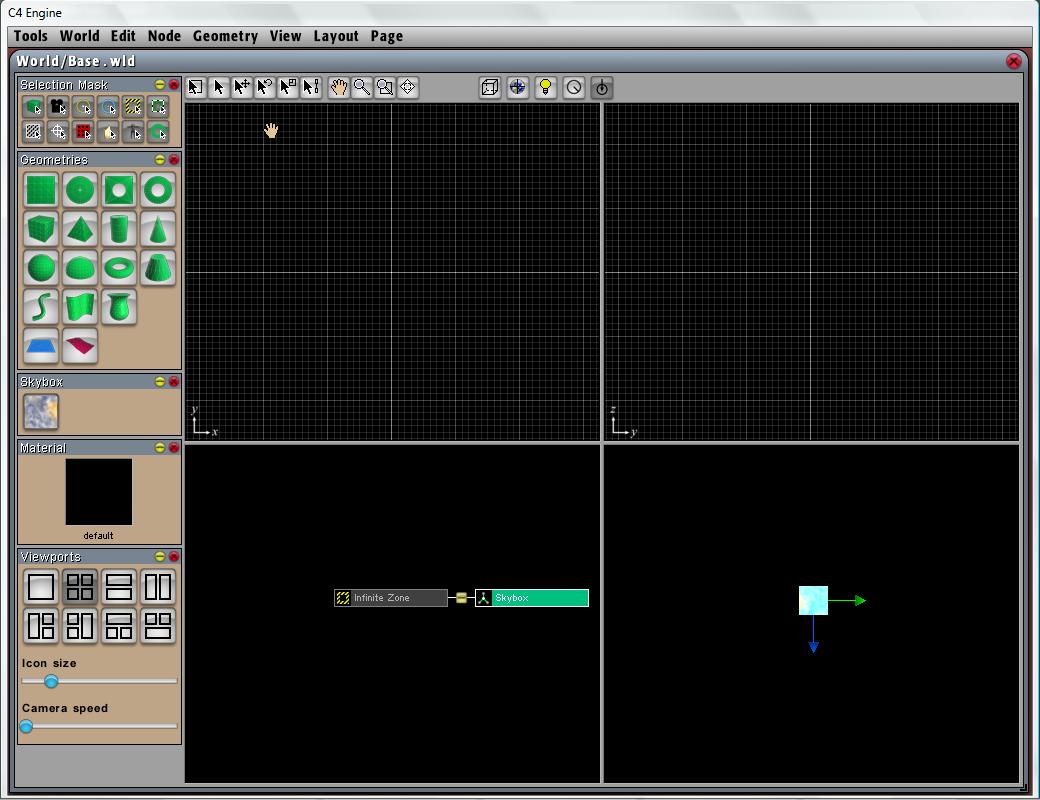
The Skybox Page is displayed on the Left.
Click on the icon and notice that the cursor turns to a small crosshair, click on the Infinite Zone node in the Scene Graph and the skybox node is attached to the Infinite Zone node. The Scene Graph now looks like this, note that the new node is highlighted in green once it is added.
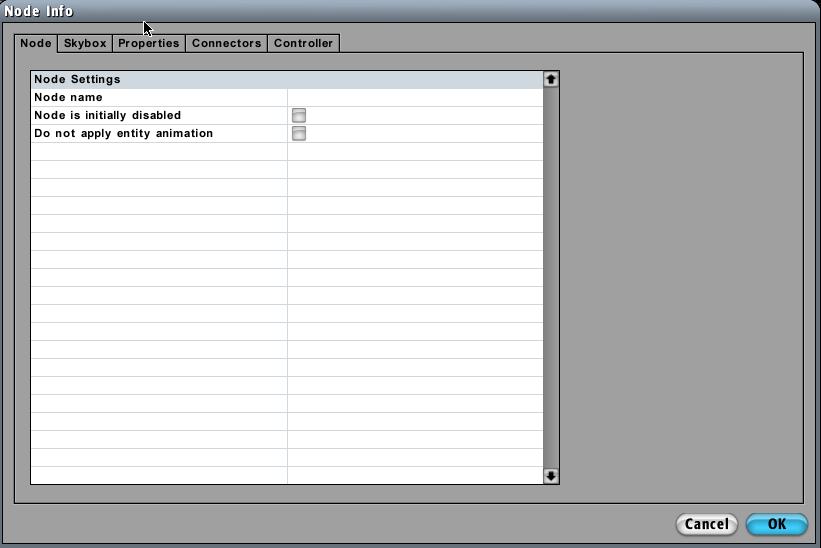
Press the 1 key or click on the button, to return to the Select Nodes pointer. Open up the Node Info dialog (By pressing Ctrl-I).
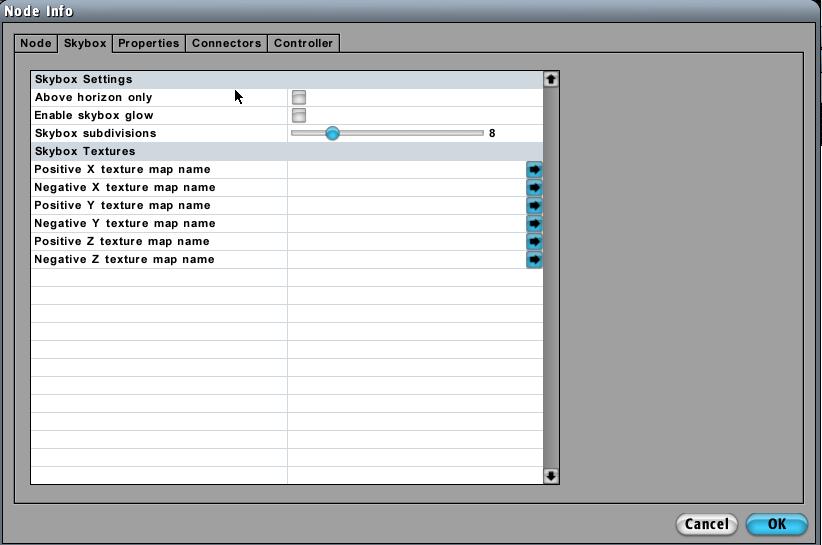
Click on the Skybox tab
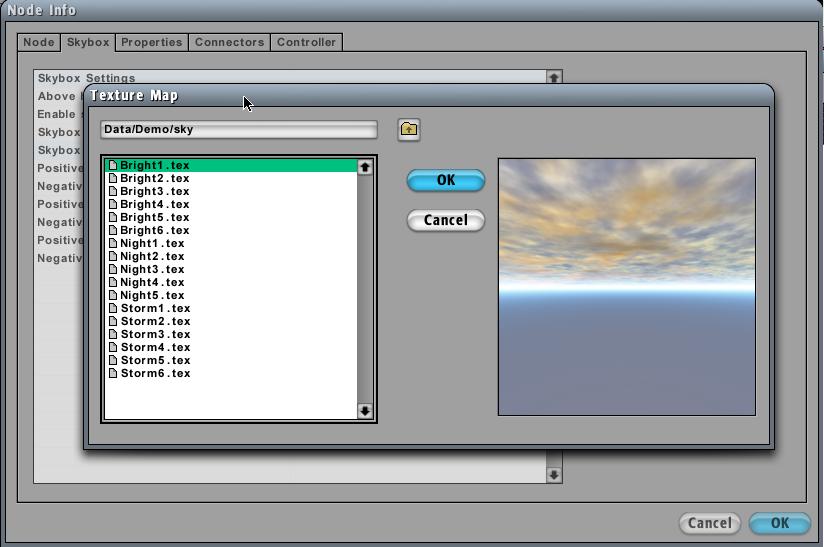
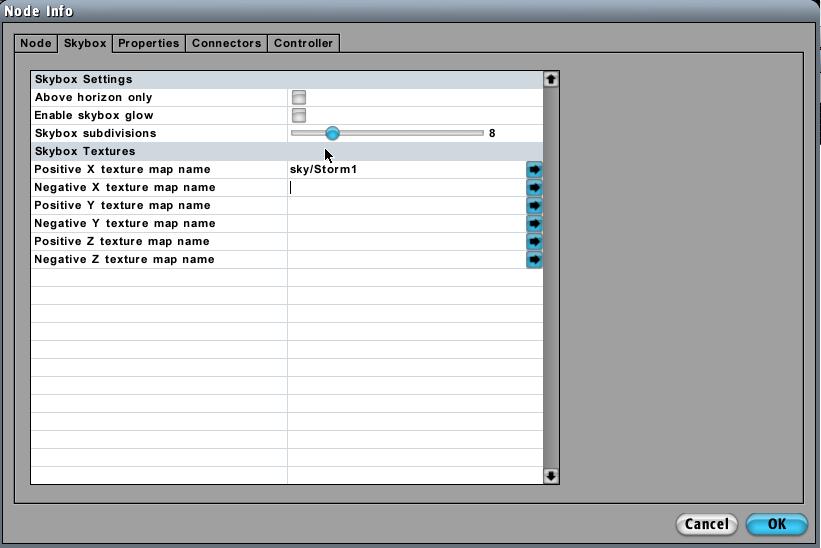
To add a texture, click on the Arrow on the right of Positive X texture map text box, and the Texture Map dialog is displayed. If the demo is being used to work through this tutorial, the textures will not be visible, and their respective text values will have to be added manually.
Select Storm1.tex and Click OK.
Note that the texture map dialog displayed Data/Demo/sky/ as the path name, whereas in the Node Info dialog the path ends up as sky/Storm1
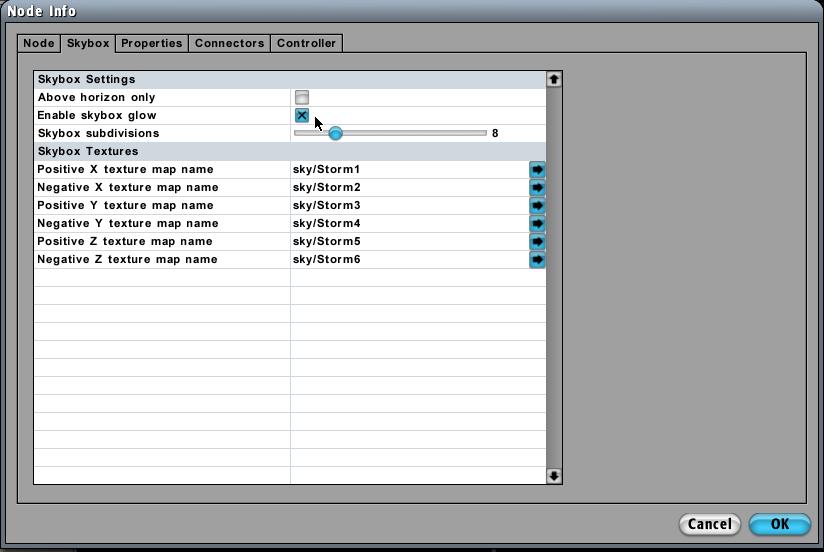
Browse to the textures or just enter them by hand, so, copy the first value and paste the values in the remaining fields, changing the final number. Also check the Enable skybox glow check box.
Click OK to finish adding your Skybox.
Creating a Plane or Geometric
For more detail or creating a geometric, please go to Adding geometric object
For add material on floor or geometric, please go to Adding Materials
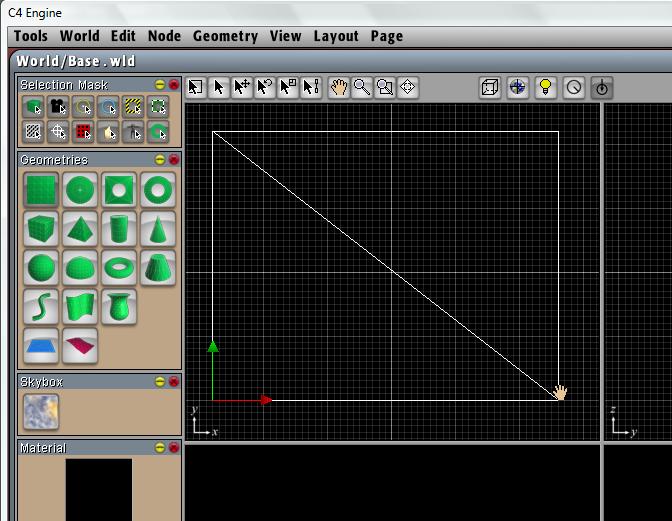
Creating a plane (or floor) to let our objects or player to run on, so they do not fall into "space"
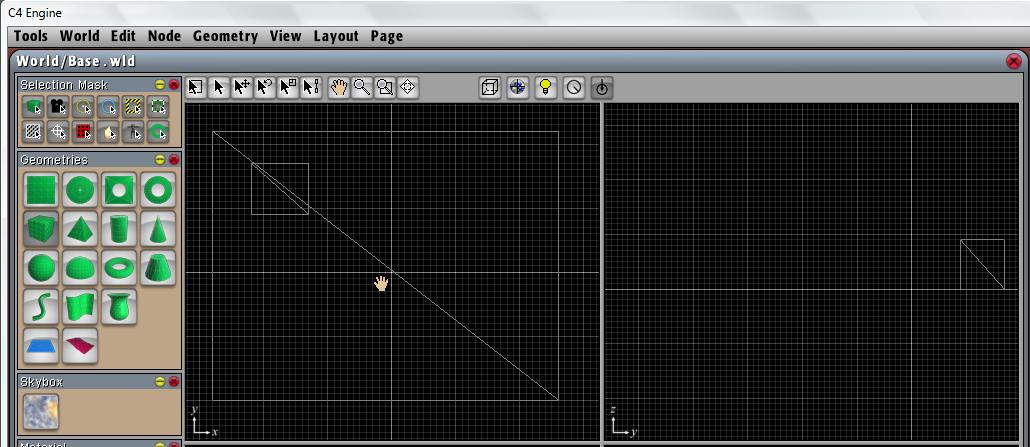
Adding a box on the plane
Creating a Player or Spectator Spawn Marker
A spawn or Spectator marker has to be added in order to run the new world.
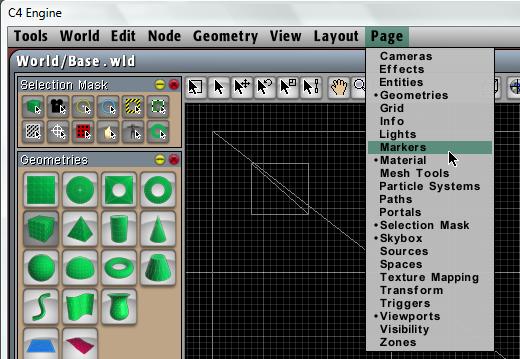
From the Page menu, select Markers.
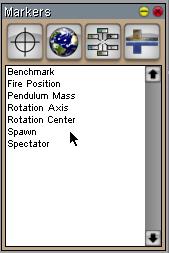
The markers page is added to the panel on the left.
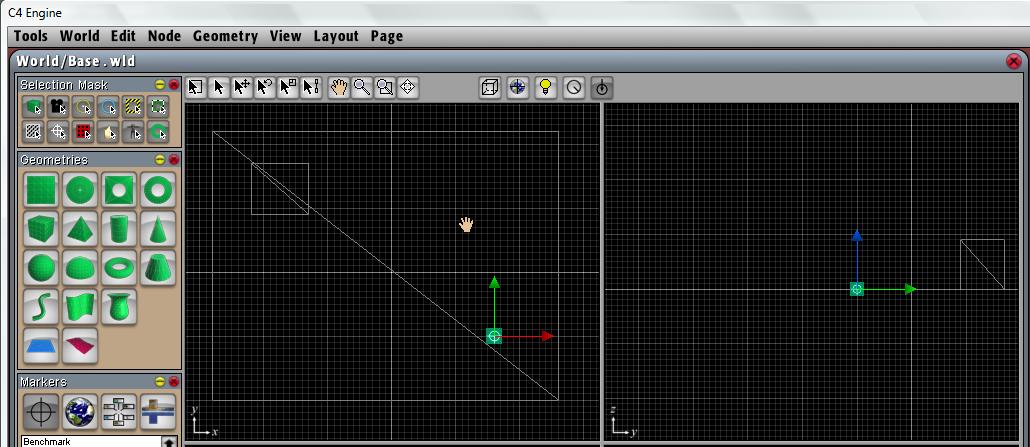
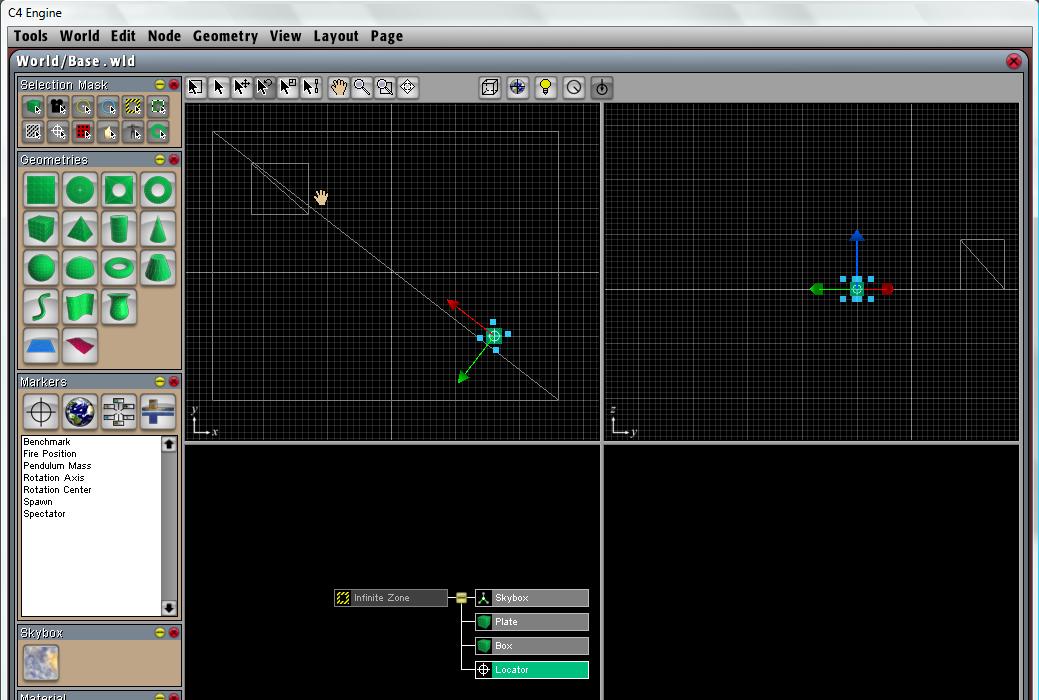
Add a Location Marker to the scene using the top left viewport, add it on top of the floor bottom right. As in the image below.
Rotate the marker around so that the red arrow points towards the column, the red arrow is the direction the player will point when spawning.
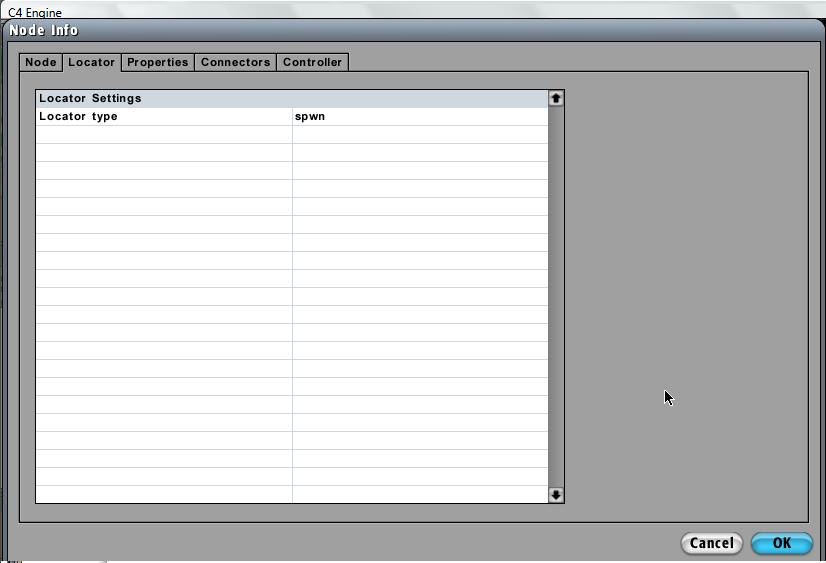
Finally decide what type of spawn marker is required, highlight the marker and press Ctrl-I, click on the Locator tab and in the Locator type text box add either spwn (for a character) or spec (for a spectator).
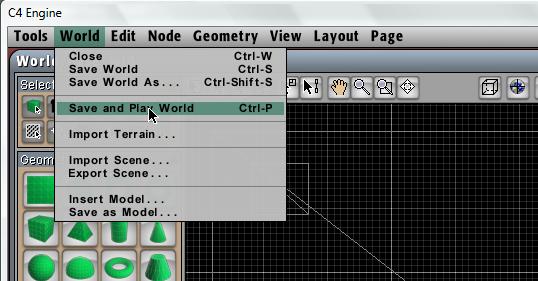
Click OK. And Save the World file. From the World menu, select Save and Play World
Once the world file loads, press ESC to remove the toolbar, you can now move around the world as a character or spectator.
Return to RCaragogo
References
http://www.terathon.com/wiki/index.php?title=Creating_a_Basic_World
