Adding lighting
From Computing and Software Wiki
| (4 intermediate revisions not shown) | |||
| Line 1: | Line 1: | ||
| - | + | Create a new world or load the world you would like to add lighting on | |
| + | <br>From the page menu, select Lights. Lights page show up on the left panel | ||
| + | <br>[[Image:Light1.jpg]] | ||
| + | <br>Choose the light style that you want. Here we use "Infinite Light" as an example. | ||
| + | Click on the Infinite Light button and add it to the scene. Use the top left viewport and click somewhere in the bottom right as seen in the image below. Once the node has been added it is made active, but it is always a good idea to click 1 on the keypad to enable the Select Nodes button. | ||
<br> | <br> | ||
| - | + | After adding the light, you could use Move Tool to move the light to the position you want and use Rotate Tool to turn where the light coming from. Looking closer at the light, notice that apart from the usual three axis manipulators there is an extra one, a yellow single line, this is the light direction. You might need to rotate it so the light direction is pointing to the direction you want. | |
| - | + | <br>[[Image:Light2.jpg]] | |
| - | + | <br>You could change the light property by selecting it and Node - Get Info or Ctrl-i | |
| - | + | [[Image:Lightifo.jpg]] | |
| - | + | <br>Before adding a light | |
| + | <br>[[Image:Lightbefore.jpg]] | ||
| + | <br>After adding a light | ||
| + | <br>[[Image:Lightafter.jpg]] | ||
<br> | <br> | ||
| - | <br> | + | ---- |
| - | + | '''References''' | |
| + | <br>http://www.terathon.com/wiki/index.php?title=Creating_a_Basic_World | ||
| + | <br>http://www.terathon.com/wiki/index.php?title=Lights_and_Shadows | ||
Current revision as of 03:03, 20 March 2008
Create a new world or load the world you would like to add lighting on
From the page menu, select Lights. Lights page show up on the left panel
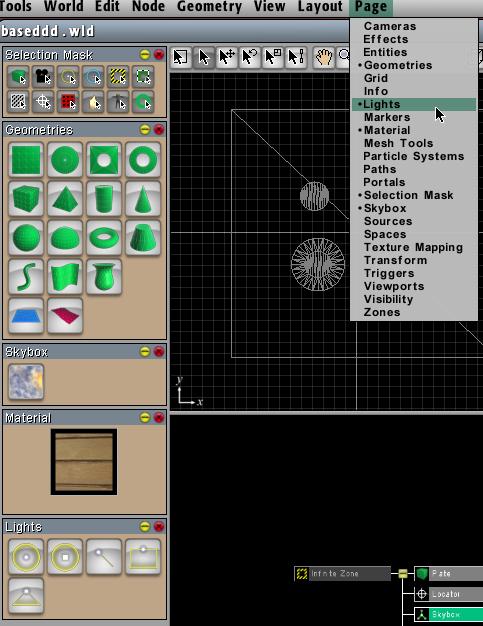
Choose the light style that you want. Here we use "Infinite Light" as an example.
Click on the Infinite Light button and add it to the scene. Use the top left viewport and click somewhere in the bottom right as seen in the image below. Once the node has been added it is made active, but it is always a good idea to click 1 on the keypad to enable the Select Nodes button.
After adding the light, you could use Move Tool to move the light to the position you want and use Rotate Tool to turn where the light coming from. Looking closer at the light, notice that apart from the usual three axis manipulators there is an extra one, a yellow single line, this is the light direction. You might need to rotate it so the light direction is pointing to the direction you want.
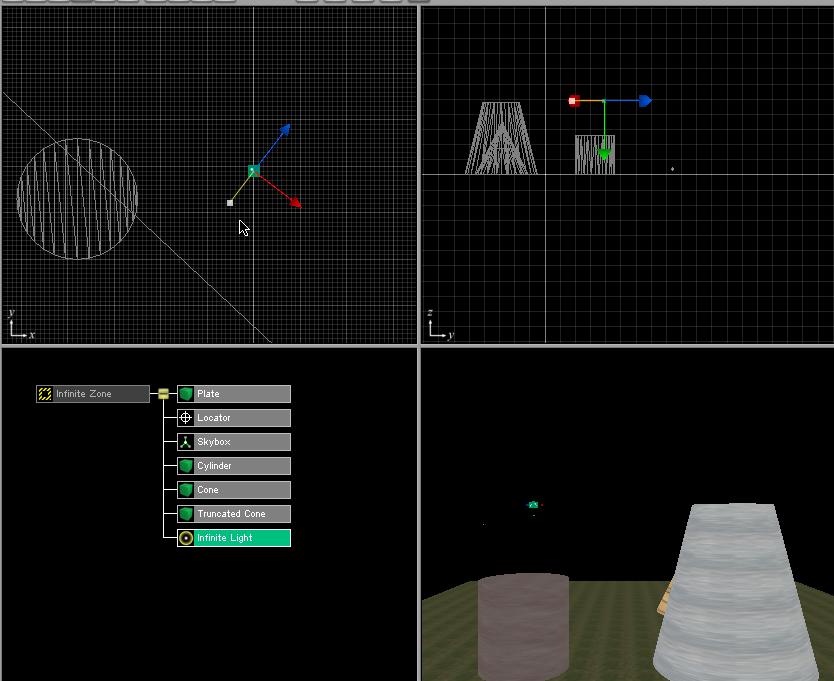
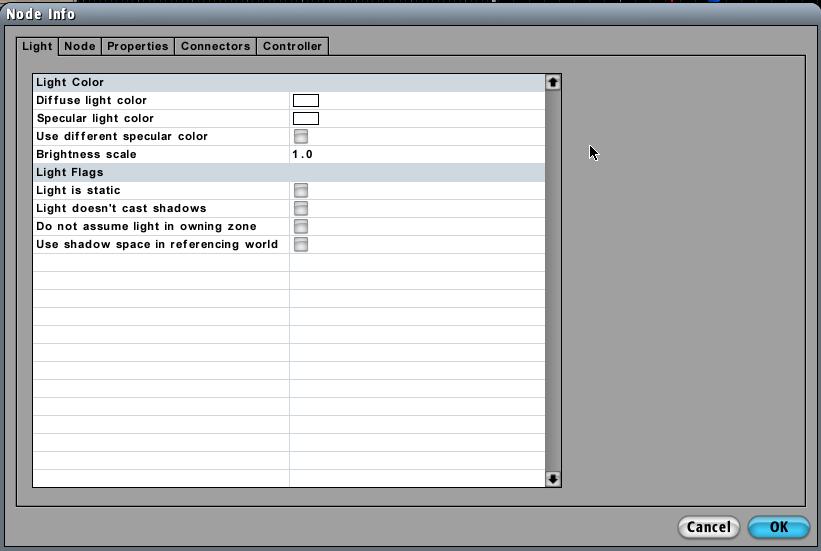
You could change the light property by selecting it and Node - Get Info or Ctrl-i
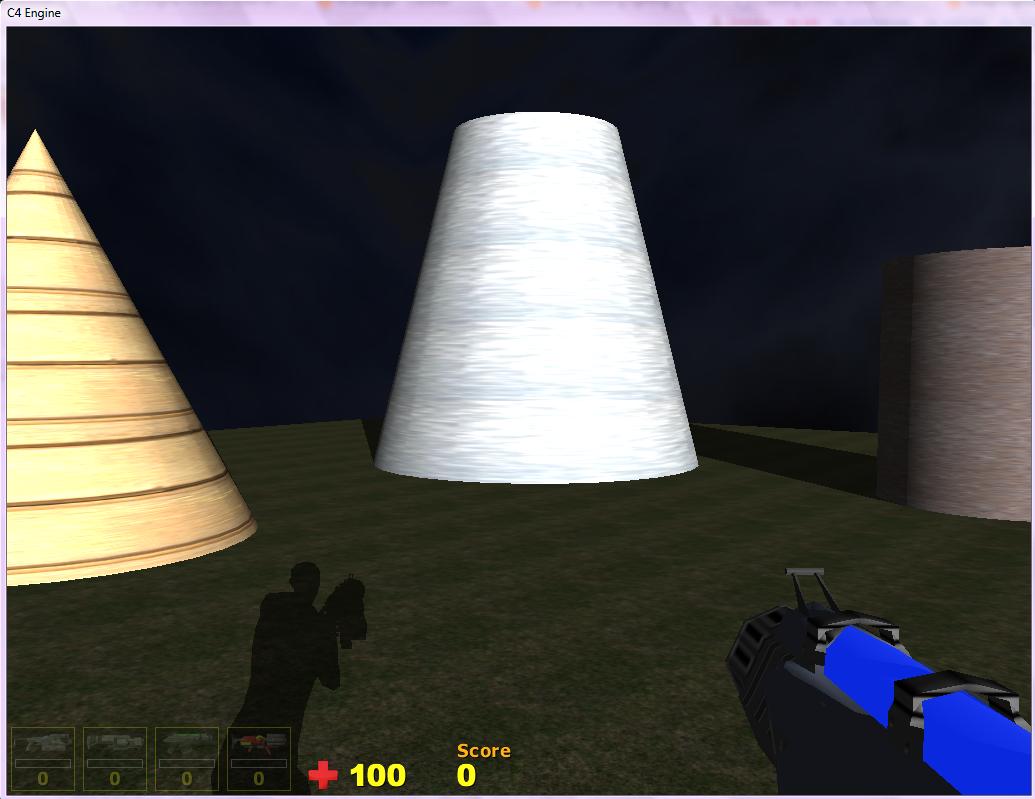
Before adding a light
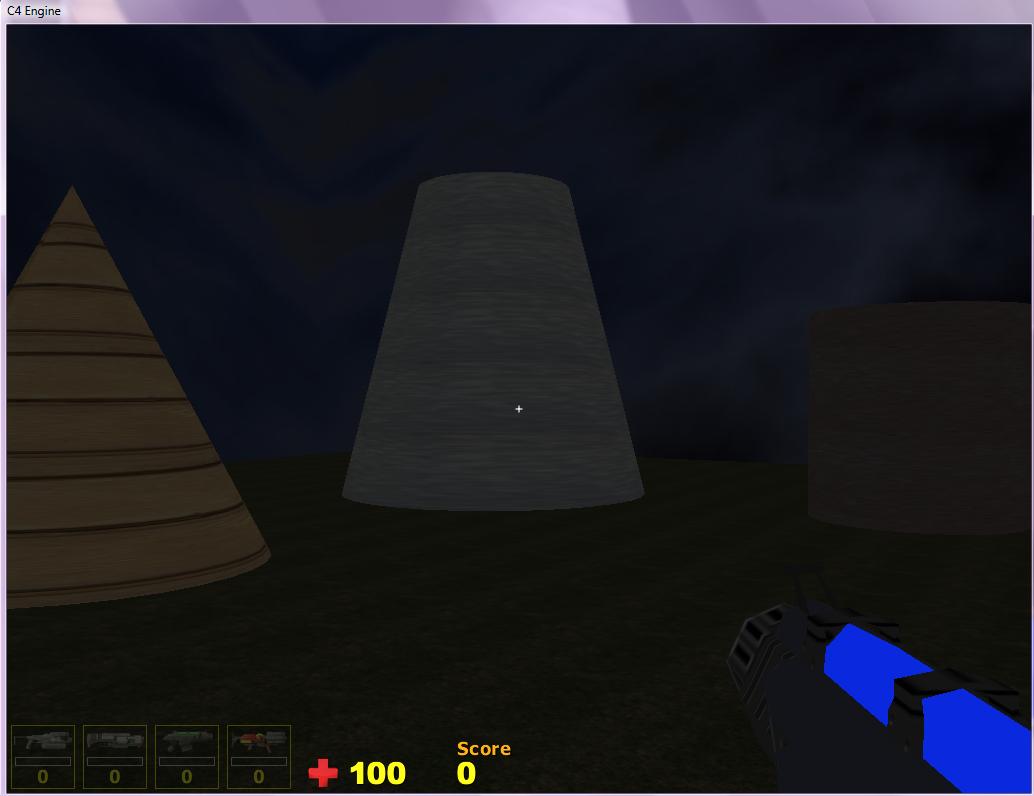
After adding a light
References
http://www.terathon.com/wiki/index.php?title=Creating_a_Basic_World
http://www.terathon.com/wiki/index.php?title=Lights_and_Shadows
